

Choose brakes for the wettest conditions and heaviest regular load on your routes; rain, grit, or a loaded e-bike can expose differences in control and maintenance. The types of bike brakes differ in where friction acts and how force reaches the wheel. Compare your route, total load, and service access before choosing.
How Different Types of Bike Brakes Work
Most types of bike brakes operated by hand have three parts: a lever, a cable or hydraulic hose, and a caliper that presses pads against a rim or rotor. A coaster brake works differently: backpedalling engages a mechanism inside the rear hub.
Where the braking happens
- Rim brakes: pads press against the wheel rim.
- Disc brakes: pads clamp onto a rotor fixed to the wheel hub.
- Coaster brakes: an internal hub mechanism slows the rear wheel.
Across the main types of bike brakes, friction slows the wheel and creates heat. Repeated braking and long descents add heat, so a short test on flat ground does not tell the whole story. Check the bike maker’s guidance for steep or regularly loaded routes.

Rim Brake Designs and Their Trade-offs
Rim brakes are simple to inspect and adjust, and they can suit a light bike used mainly in dry conditions. Common designs include road caliper brakes, V-brakes, and cantilever brakes; their arm and cable layouts differ, so replacement levers and pads must match the system.
What to weigh
- Advantages: visible pads, familiar cable adjustment, and no separate rotor.
- Trade-offs: water and grit can affect braking at the rim; the braking track itself wears over time.
If a wheel rubs the pads, check whether it is out of true or the brake needs adjustment. Also inspect the rim’s braking track for a wear indicator, a concave surface, or damage. A worn rim should be assessed by a bike shop rather than “fixed” by moving the pads.
Mechanical Disc Brakes for Everyday Commuting
Mechanical disc brakes use a steel cable to operate a caliper, which presses pads against a hub-mounted rotor. The rotor sits farther from road spray than a rim’s braking track, while cable actuation is familiar to many riders and workshops.
Some mechanical calipers need manual pad or cable adjustment as parts wear. The adjustment differs by model, so use the caliper maker’s instructions; do not assume every system can be tuned with the same bolt or tool. A disc brake still needs pad, rotor, and cable checks, and its rotor can be hot after use.
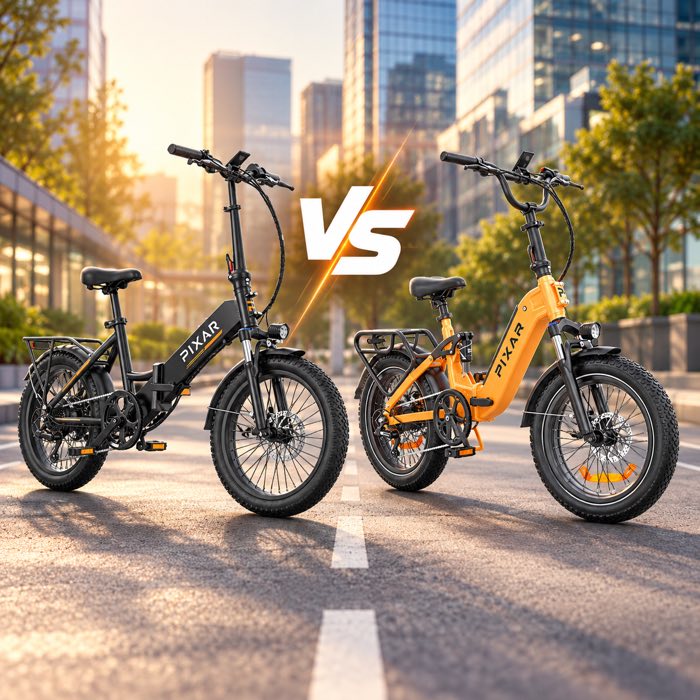
PIXAR Rusher has a 180 mm mechanical disc brake. This is one model’s configuration, not a universal recommendation for every rider, load, or route. For a closer comparison of cable and hydraulic systems, see our guide to hydraulic vs mechanical e-bike brakes.

Hydraulic Disc Brakes and Lever Feel
Hydraulic disc brakes transfer lever force through fluid in a sealed hose to move the caliper pistons. Many riders find the lever easier to operate and the braking easier to modulate, but performance still depends on setup, pads, rotor, tyres, and conditions.
Many hydraulic systems compensate for pad wear, but they are not maintenance-free. Pads and rotors need inspection, fluid leaks need service, and a brake may require bleeding if air enters the circuit or lever feel changes. The fluid and service procedure depend on the component; mineral oil and DOT fluid are not interchangeable.
PIXAR C1 Pro uses hydraulic disc brakes. Before comparing detailed performance, confirm the exact rotor and caliper specifications for the bike and component version. Choose hydraulic brakes when their lever feel and available service support suit your riding; the label alone does not guarantee a shorter stop.

How Coaster Brakes Work and Where They Fit
Coaster brakes work inside the rear hub and engage when the rider pushes the pedals backward. Their enclosed mechanism is less exposed to road spray, and the handlebar does not need a brake lever for that rear brake.
The trade-off is control: a coaster brake acts on the rear wheel only and cannot be operated through a hand lever. Backpedalling can be awkward if the cranks are poorly positioned. Consider those limits in traffic or on steep routes, and check the maker’s instructions for any additional braking system.
Rim Brakes vs Disc Brakes in Wet Conditions
In a rim brakes vs disc brakes comparison, wet riding often favors disc braking because its rotor is higher and farther from road spray than the rim’s track. Rim brakes can still work well when correctly set up, but water and grit may affect pad-to-rim contact and increase wear on both pads and rim.
The trade-offs to compare
| Check | Rim brakes | Disc brakes |
|---|---|---|
| Braking surface | Wheel rim | Hub-mounted rotor |
| Wear parts | Pads and rim track | Pads and rotor |
| Wet or gritty routes | More exposed to road spray | Rotor sits farther from the road |
| Ongoing check | Pad position and rim wear | Pad wear, rotor condition, and contamination |
No brake type guarantees a fixed stopping distance. Tyres, speed, load, road surface, setup, and rider technique all matter. In rain, slow before corners, leave more room, and brake smoothly; no component can prevent a tyre from losing grip on a slick surface. Our guide to riding an e-bike in the rain covers wet-weather checks and riding adjustments.
Choosing E-Bike Brakes for the Complete Bike
Choose e-bike brakes for the complete bike and its intended use. Rider, accessories, and carried cargo add to the load; speed and repeated braking also affect how much work the brakes must do. A motor rating or “heavy-duty” label alone cannot confirm that a brake setup is suitable.
Before buying or changing components, check:
- the manufacturer’s permitted total load;
- the installed brake type and rotor size, where specified;
- the limits for the frame, fork, caliper, and rotor mount;
- whether replacement pads and local service are available.
A larger rotor can change braking leverage and heat management, but it must be approved for the specific bike and brake system. Some e-bikes also have a brake-lever sensor that signals the motor controller; check the model documentation to confirm whether it is fitted and how it works.
PIXAR Rusher uses a 180 mm mechanical disc brake, while PIXAR C1 Pro uses hydraulic disc brakes. These examples show different configurations rather than a ranking. Compare the full specification with your route, load, maintenance preference, and how comfortably you can operate the levers.
Choosing Between Types of Bike Brakes
Compare types of bike brakes by the conditions you face most often: weather, hills, stop-start traffic, total load, and the service you can access. Use this quick comparison as a starting point, then check the actual bike and component limits.
| Riding situation | Brake type to compare | Check before choosing |
|---|---|---|
| Light bike, mostly dry roads | Rim brakes | Pad and rim wear; wheel alignment |
| Wet-weather commuting | Mechanical or hydraulic disc | Parts availability; rotor and pad condition |
| Frequent stops or long descents | Hydraulic disc | Lever comfort; service access; system limits |
| Flat, low-speed riding | Coaster brake | Rear-only control; crank position; maker’s guidance |
Maintenance preference includes service access. Cable systems may be familiar to home mechanics; hydraulic systems avoid cable-tension adjustment but may need specialist bleeding. If a brake feels weak, leaks, or grinds, stop and have it checked before riding.
Bike Brake Maintenance and Pad Inspection
Bike brake maintenance starts with inspecting both brakes before riding and checking wear more often after wet, gritty, or hilly rides. Follow the component maker’s manual rather than using a universal mileage or pad-thickness rule.
Quick inspection
- Disc brakes: check pad wear, rotor damage, leaks, and unusual lever travel.
- Rim brakes: check pad grooves, pad position, wheel alignment, and the rim’s braking track.
- Both systems: keep oil and grease off braking surfaces; stop riding if braking has weakened or changed suddenly.
Wear limits vary by component. Shimano’s safety instructions for certain disc brakes, for example, specify a minimum pad thickness and rotor condition; consult the manual for the exact brake fitted to your bike. Shimano’s disc-brake instructions also advise against using a cracked or deformed rotor.
Use only a cleaner approved for the brake parts, and follow the bedding-in procedure for new pads or a rotor. If squealing, rubbing, contamination, or weak braking remains, ask a mechanic to inspect the system. Our electric bike repair guide explains when workshop support is needed.
Conclusion
Rim brakes can suit lighter bikes and dry routes; disc brakes place the braking surface away from the rim and can be more consistent in wet conditions. Mechanical and hydraulic systems differ in actuation and service needs, while coaster brakes offer rear-hub simplicity with narrower control. For an e-bike, match the complete brake setup to the approved load, route, and maintenance support, then inspect it according to the component manual.
Frequently Asked Questions
Can you convert a rim-brake bike to disc brakes?
Usually, no. The frame and fork need approved disc mounts, and the wheels need compatible hubs. Have a qualified mechanic check the exact bike before considering a conversion.
Are hydraulic disc brakes necessary on an e-bike?
No. Compare the bike’s approved load, route, brake specification, and the lever force you can comfortably apply. Hydraulic brakes may suit frequent stops or long descents, but a properly specified mechanical setup can work for other uses.
Why can coaster brakes be difficult on long descents?
They act on the rear wheel through the hub, so control differs from using hand levers and separate brakes. Check the bike maker’s guidance and choose a setup intended for your route.
How often should bike brake pads be replaced?
There is no single mileage for every pad or riding condition. Inspect them regularly and replace them at the wear limit in the exact component manual; get service sooner if braking weakens or changes.